Building a Lightbox for Photos Using the HTML Dialog Element
I've been working on my photography site of late, trying to get it back online since I took it offline however many years ago. One thing I knew I wanted was a way to view a larger version when clicking an image. I've used several JavaScript libraries over the years to handle these lightboxes, but this time around I wanted to see how I could do with using the <dialog /> element and a little bit of JavaScript.
Here's how I have the HTML/CSS of one of my photo set pages laid out:
CSS
.photos {
  display: flex;
  flex-direction: column;
  gap: 8px;
}

.photos .row {
  display: flex;
  gap: 8px;
}

.photos .row img {
  min-width: 0;
}
HTML
<section class="photos">
<div class="row">
<img src="/images/photosets/2012-cape-may/2012-cape-may-01.jpg" alt="A seagull standing on a post over waves" />
</div>
<div class="row">
<img src="/images/photosets/2012-cape-may/2012-cape-may-02.jpg" alt="Waves rolling onto sand" />
<img src="/images/photosets/2012-cape-may/2012-cape-may-03.jpg" alt="Waves crashing against rocks" />
</div>
<div class="row">
<img src="/images/photosets/2012-cape-may/2012-cape-may-07.jpg" alt="A view down an alleyway with a yellow building in the background" />
<img src="/images/photosets/2012-cape-may/2012-cape-may-08.jpg" alt="A victorian mansion" />
<img src="/images/photosets/2012-cape-may/2012-cape-may-09.jpg" alt="Cape May city hall behind a blossoming cherry tree" />
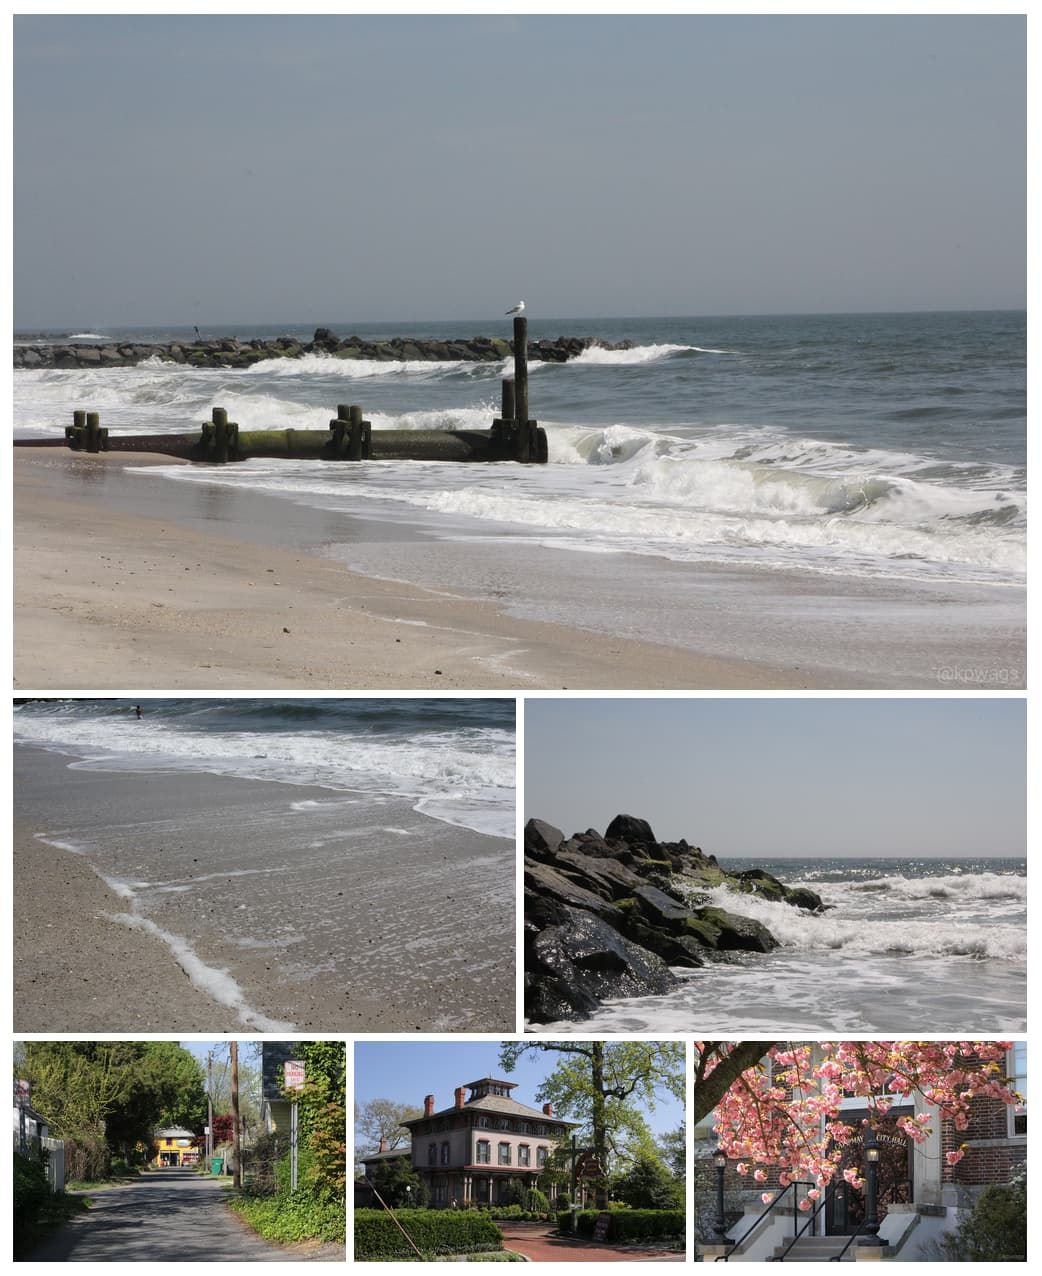
</div>
</section>It looks like this:
Now each one of those images isn't clickable. I could add an click event to the image, but that would fail with accessibility.
Let's change it up slightly to make each image a button instead. First, we'll apply some styling to the buttons to get rid of the border, padding, and background.
CSS
.photos {
  display: flex;
  flex-direction: column;
  gap: 8px;
}

.photos .row {
  display: flex;
  gap: 8px;
}

.photos .row img {
  min-width: 0;
}

.photos button.image {
  padding: 0;
  border: none;
  background: transparent;
}
HTML
<section class="photos">
  <div class="row">
    <button type="button" class="image">
      <img src="/images/photosets/2012-cape-may/2012-cape-may-01.jpg" alt="A seagull standing on a post over waves" />
    </button>
  </div>
  <div class="row">
    <button type="button" class="image">
      <img src="/images/photosets/2012-cape-may/2012-cape-may-02.jpg" alt="Waves rolling onto sand" />
    </button>
    <button type="button" class="image">
      <img src="/images/photosets/2012-cape-may/2012-cape-may-03.jpg" alt="Waves crashing against rocks" />
    </button>
  </div>
  <div class="row">
    <button type="button" class="image">
      <img src="/images/photosets/2012-cape-may/2012-cape-may-07.jpg" alt="A view down an alleyway with a yellow building in the background" />
    </button>
    <button type="button" class="image">
      <img src="/images/photosets/2012-cape-may/2012-cape-may-08.jpg" alt="A victorian mansion" />
    </button>
    <button type="button" class="image">
      <img src="/images/photosets/2012-cape-may/2012-cape-may-09.jpg" alt="Cape May city hall behind a blossoming cherry tree" />
    </button>
  </div>
</section>
It still looks the same on the page, good. The next part will be to add the dialog element to the page.
CSS
:root {
  --white: #ffffff;
  --z-index-dialog: 30;
}

.photo-modal {
  position: relative;
  padding: 0;
  z-index: var(--z-index-dialog);
}

.photo-modal::backdrop {
  background: rgba(0, 0, 0, .5);
}

.photo-modal button.close-photo-modal {
  position: absolute;
  top: 16px;
  right: 16px;
  width: 32px;
  height: 32px;
  border: none;
  background: transparent;
  padding: 0;
  z-index: calc(var(--z-index-dialog) + 5);
}

.photo-modal button.close-photo-modal:hover svg {
  fill: var(--white);
}

.photo-modal button.close-photo-modal svg {
  width: 32px;
  height: 32px;
}

.photo-modal button.close-photo-modal img {
  width: 100%;
}
HTML
<dialog class="photo-modal">
  <button type="button" class="close-photo-modal">
    <svg xmlns="http://www.w3.org/2000/svg" width="16" height="16" viewBox="0 0 16 16" aria-label="close modal">
      <path d="M16 8A8 8 0 1 1 0 8a8 8 0 0 1 16 0M5.354 4.646a.5.5 0 1 0-.708.708L7.293 8l-2.647 2.646a.5.5 0 0 0 .708.708L8 8.707l2.646 2.647a.5.5 0 0 0 .708-.708L8.707 8l2.647-2.646a.5.5 0 0 0-.708-.708L8 7.293z"/>
    </svg>
  </button>
  <img src="" alt="" />
</dialog>
The dialog is on the page, and all it contains is an empty image element and a close button. The close button is z-indexed to be on top of the image and the dialog so it should always be visible and clickable.
NoteThe close button though is still one thing I'm working on. Depending on colors the image, it can be hard to see.
Now that the HTML and CSS are in place, time for a little bit of JavaScript.
function closeModal() {
  document.querySelector('dialog.photo-modal').close();
}

function openModal(img) {
  const imgSrc = img.getAttribute('src');
  const imgAlt = img.getAttribute('alt');

  document.querySelector('dialog.photo-modal img').setAttribute('src', imgSrc);
  document.querySelector('dialog.photo-modal img').setAttribute('alt', imgAlt);

  document.querySelector('dialog.photo-modal').showModal();
}

addEventListener('DOMContentLoaded', function () {
  const photoButtons = document.querySelectorAll('button.image');

  photoButtons.forEach((btn) => {
    btn.addEventListener('click', function (e) {
      openModal(e.target);
    });
  });

  document.querySelector('button.close-photo-modal')?.addEventListener('click', function () {
    closeModal();
  });
});
27 lines is all you need, less if you want to condense it more. Let's take a look at what's going on.
The top function, closeModal() is simple enough, it closes the modal using the built-in close() function.
In the DOMContentLoaded event, I assign the close event to the click handler of the close button on the modal. I also go through each image button and add the click handler for each and call the openModal() function with the target of the event, which in this case is the image. I got tripped up on this initially thinking it'd be the button, but as it turns out, since the image covers the entire height and width of the button, the target ends up being the image. It's not a big deal, makes it a little easier actually.
The openModal() function is where the magic happens. It takes a single argument, the image that was clicked on. The first thing I want to do is grab the URL and alt text for the image clicked on. I use JavaScript's getArttribute() method to do that.
const imgSrc = img.getAttribute('src');
const imgAlt = img.getAttribute('alt');
I now have the URL of the image and it's alt text. Next step is to apply those values to the empty image in the <dialog /> element. I can use the setAttribute() method to do that.
document.querySelector('dialog.photo-modal img').setAttribute('src', imgSrc);
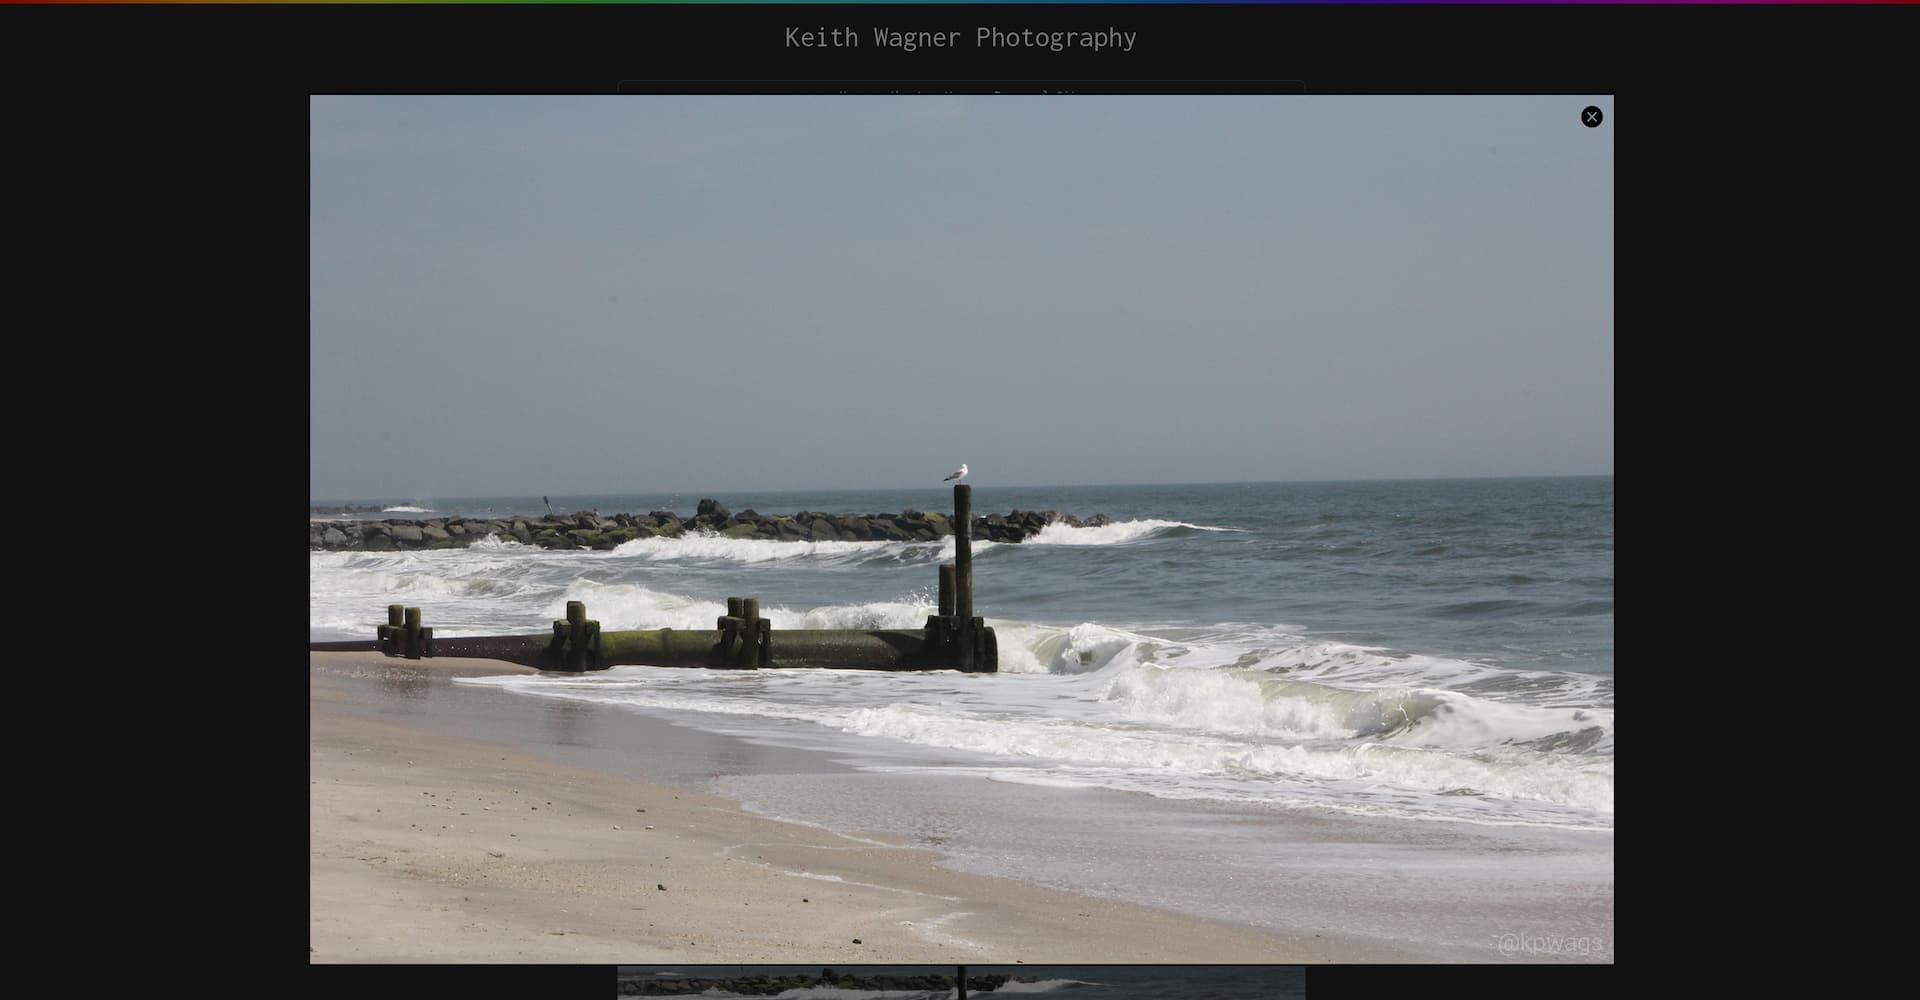
document.querySelector('dialog.photo-modal img').setAttribute('alt', imgAlt);At this point, the <dialog /> element is all built out. It has the image and descriptive text applied to it, all we need to do is make it visible to the user.
document.querySelector('dialog.photo-modal').showModal();And now the user sees it.
There are still some rough edges I need to smooth out, especially on mobile, but with minimal JavaScript, and no third-party libraries, I was able to get a something up and running to allow users to view a larger version of the image.
While I try to make what I build accessible, it is still something I'm learning. If you notice something that I could improve upon, please let me know.